Unit #0 Introduction
Using Visual C++ ( step by step)
| Step 1: |
From Start select Programs - Microsoft Visual Studio - Microsoft Visual C++ |
click for more |
| Step 2: | Select a new C++ source file to write your program or open an old file | click for more |
| Step 3: | Type a few lines of your program in the editor window. | click for more |
| Step 4: | Save as the file in a temporary folder ( a folder on the desktop or in a location of C:) | click for more |
| Step 5: | Finish typing your program. Inspect it. | |
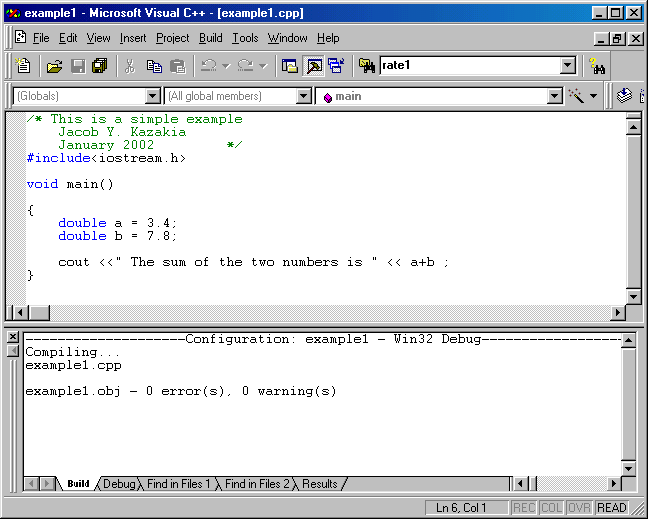
| Step 6: | From Build button select Compile. Watch the messages generated in the debug W. | click for more |
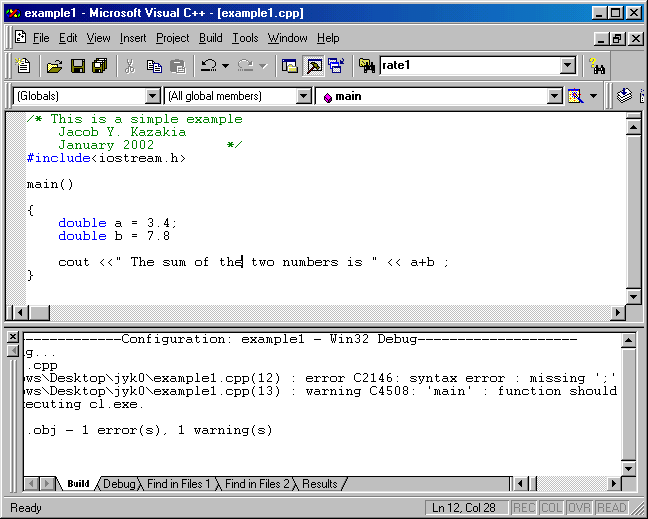
| Step 7: | Correct your syntax errors. Try to eliminate all warnings as well, if possible. | click for more |
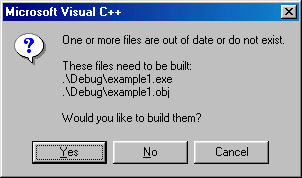
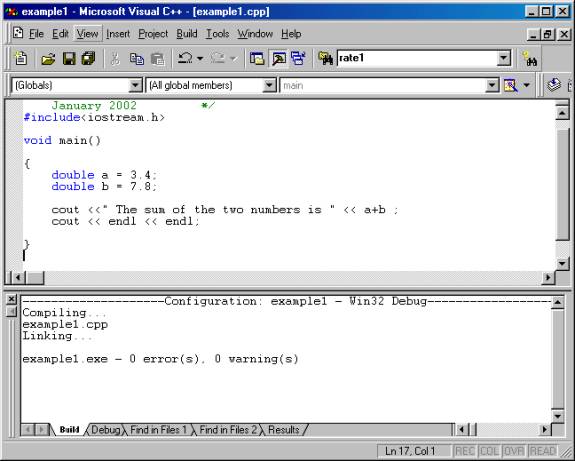
| Step 8: | Once all compilation errors are fixed, from Build select ! Execute ( it will first Build) | click for more |
| Step 9: |
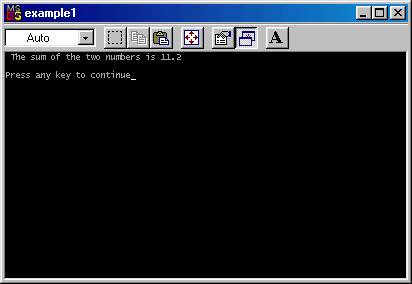
If there are
no Build or Execution errors, a DOS screen will appear. |
click for more |
| Step 10: | If you are going to work on another program and save it with a different name,you must select from File, Close Workspace. If you want to reuse some lines of the code you wrote ( typical) , answer No to the dialog question. |
Step 1: From Start select Programs - Microsoft Visual Studio - Microsoft Visual C++
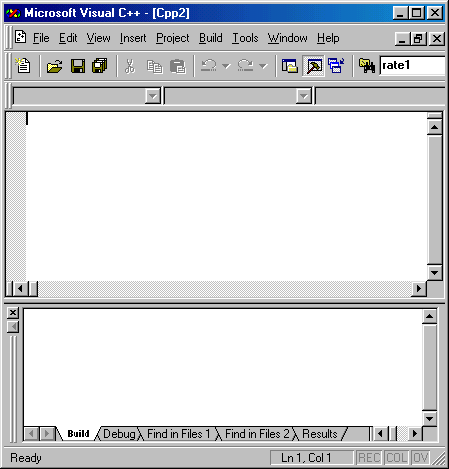
If you have done the installation of the Visual Studio correctly, then clicking on the Start button and subsequently on the Programs button should reveal the Microsoft Visual Studio 6.0 with its own selection buttons. Select the Microsoft Visual C++. When the program starts, it will open like this:
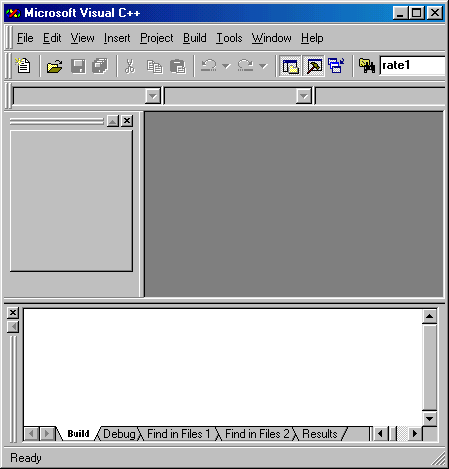
The dark gray space on the right upper side is the location where you
will be writing your program, once you open a new file as described
in Step 2. The editor window docks into this space.
The white window at the bottom is the place where the compiler messages
and warnings are given.
The light gray window on the upper left is used to navigate files and
workspaces in programs that consist of many files. In this course we will
not be using this facility. So, you may as well close this window
by clicking on the X.
Step 2: Select a new C++ source file to write your program or open an old file
To open a new C++ source file, click File and select New. You will be shown the following selection window
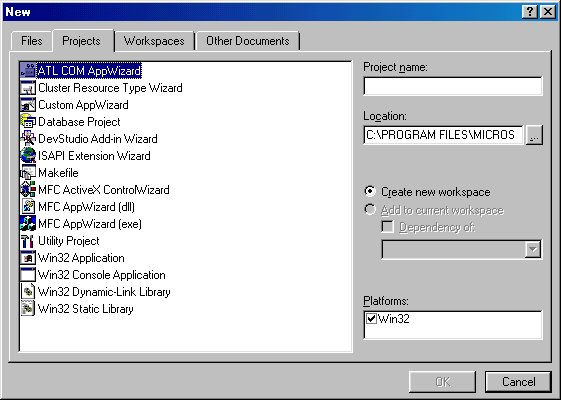
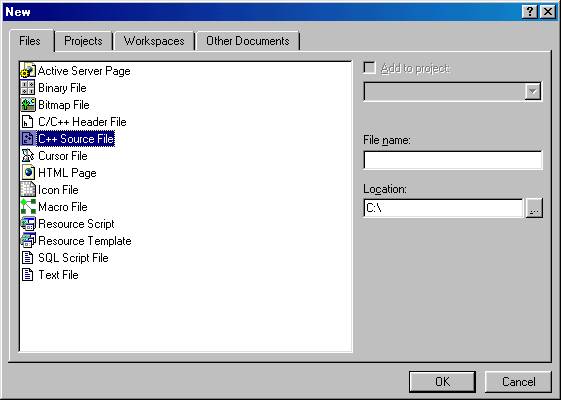
Tab on Files and then select C++ Source File as shown below and click OK.
The picture below shows how the Visual C++ program looks at this point ( you remembered to close the workspace window on the upper left side). Notice the default name for the file Cpp2. We will change this in Step 4.
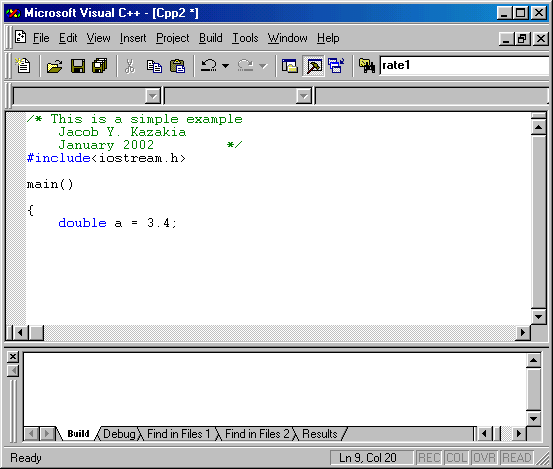
Step 3: Type a few lines of your program in the editor window.
Here we show just a few lines of a very simple program. Notice that the editor ( knowing that we are writing a C++ source file) uses color to make our inspection of the text easier. Green is used for comments, blue for reserved words and the rest is black.
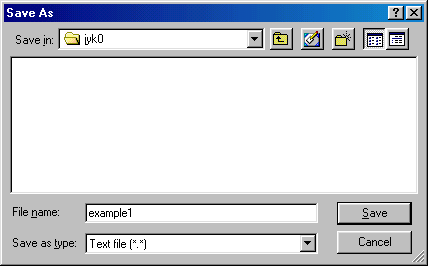
Step 4: Save as the file in a temporary folder ( a folder on the desktop or in a location of C:)
We must now save our file in a location of our choice. It is suggested that you create a folder on the desktop, named it with your own Lehigh user ID ( mine is jyk0 ) and save your incomplete file there. This saving must be done often during our writing of the program so that we don't lose our work. Notice that we choose our own name for the file ( in this case example1 ). Here is the Save dialog:
Step 5: Finish typing your program. Inspect it.